
Landroid’s boundary wire is the perimeter inside which Landroid will mow.
Installation
Once your charging charging base is fixed (see How to place properly the charging base) you can proceed to lay down the boundary wire.
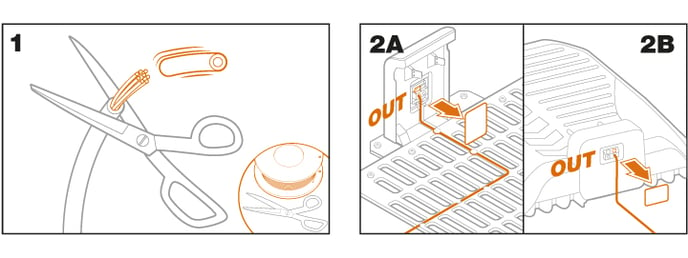
Connect one end of the boundary wire to the charging station
• Strip the end of the wire with a pair of scissors (fig. 1)
• Open the plastic door and insert the stripped end into the red left clamp of the base, depending on the model (fig. 2A-2B)
• Pass the wire through the guide of the base, as shown in fig. 2A-2B.
Lay the boundary wire around your lawn
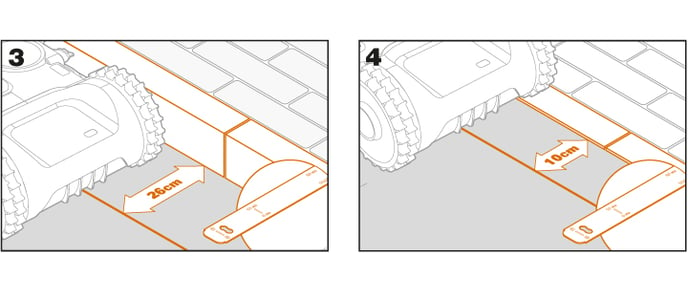
• Use the supplied gauge to set the distance wire to edge
• If there is a step at the edge of your lawn or if there is gravel, keep the wire at 26cm from it (fig. 3)
• If there is no step, keep the wire at 10cm from the edge (fig. 4)
• If a side of your lawn borders a neighbor’s lawn with a robotic mower in use, lay your wire 1m apart from your neighbor’s wire to avoid possible interference.
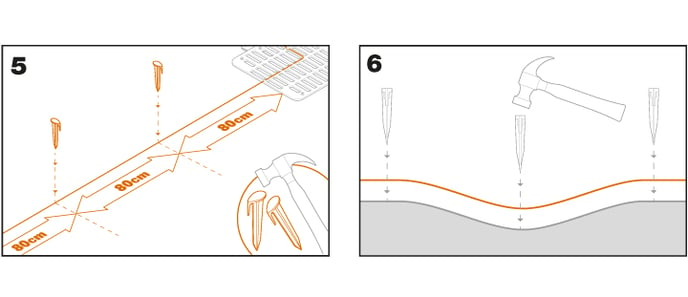
 Secure the wire to the ground using pegs
• Place pegs at approximately 80cm to each other (fig. 5)
• Make sure the wire is always in close touch with the ground (fig. 6)
 Lay perimeter islands, if needed
Protect flower beds, ponds, tree roots and other areas by surrounding them with the boundary wire (fig. 7).
For more information, follow this link: How to setup an island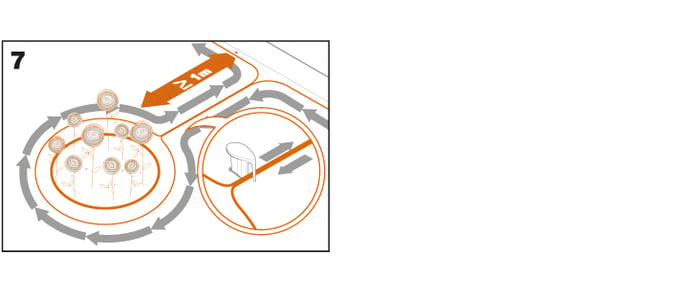
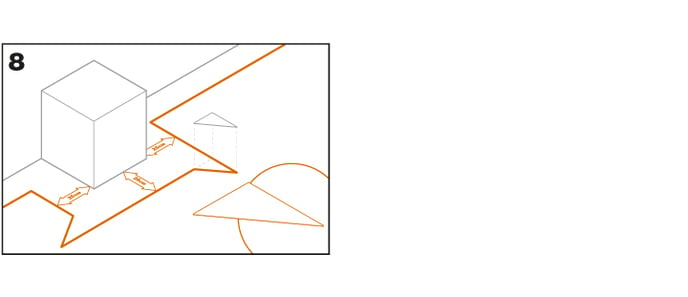
Bertelsen method: how to make perfect 90° angles with corners facing the lawn
If there are 90 degree corners that face the inside of your lawn, use the Bertelsen ruler (fig. 8) to help Landroid make perfect turns (and remove the risk that Landroid hits an obstacle on the border of the lawn whilst doing this manoeuvre).
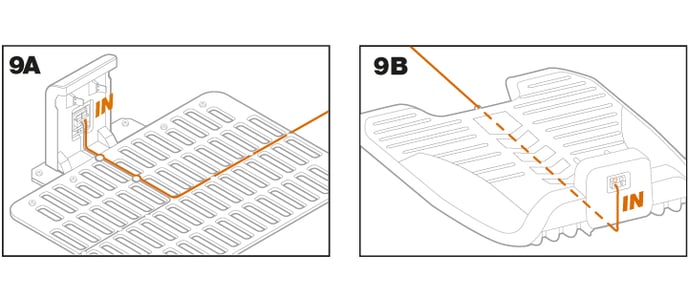
 Close the loop
Once you have completed laying the wire on the perimeter of your lawn, you will arrive back to the charging base.
• Pass the wire through the guide in the base, up to the clamp, depending on the model (fig.9A-9B)
• Cut the exceeding wire and strip the end with a pair of scissors
• Insert the stripped end into the black right clamp
Final steps
The boring part is over! There are only a few more steps to go:
• Connect the charging station to the AC mains socket (fig. 10)
• If everything is fine, the LED will light green
• If there’s a trouble in the loop, such as broken wire or wire ends not properly clamped, the LED will turn red. Please double check this article How to repair the boundary wire 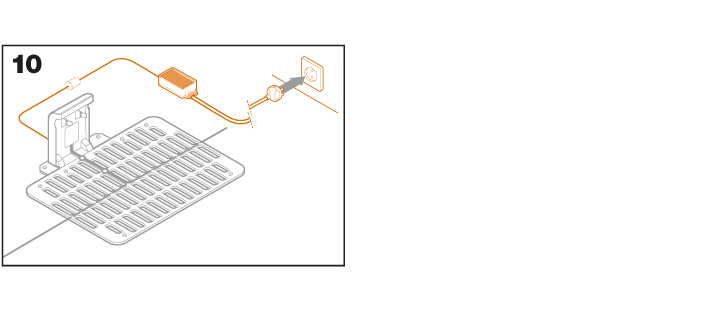 . • Open the rear of Landroid and insert the PowerShare battery into the slot until it clicks (fig.11) (only for models 2019/2020: WR130E, WR141E, WR142E, WR143E, WR147E, WR153E and WR155E).

Place Landroid on charge by making sure a good contact is established with the base. The LED will turn solid red while charging.
Let Landroid charge the battery for a while. Whilst it is charging you may want to understand how to set Landroid Wi-Fi connection
Boundary wire connectors
Landroid box includes two small, waterproof boundary wire connectors. They can be used for the following:
• When your lawn has a very long perimeter and you need extra boundary wire to complete the installation. Please do not exceed 350m of boundary wire: this is the maximum length of the boundary wire perimeter
• When the boundary wire is cut by accident and you need to fix it
• When you decide to rework your garden in the future and need to modify the original boundary wire installation
Please refer to the article How to repair the boundary wire to properly use the wire connectors.
Articles series:
- Landroid installation plan
- How to properly place the charging base
- How to lay down the boundary wire
- How to connect Landroid to Wi-Fi