How to upgrade the firmware for Landroid S 2017/2018
At Worx we never stop improving. In order to get the most out of your Landroid robot mower, always install the latest available firmware.
Some product features are enabled only when the latest versions of patches or firmware are installed. In order to achieve best performance, safety and stability, installing the latest available patches or firmware is required.
This tutorial covers the models WR090S, WR091S, WR092S, WR093S, WR094S, WR095S, WR096S, WR100SI, WR101SI, WR101SI.1, WR102SI, WR102SI.1, WR103SI, WR104SI, WR104SI.1, WR105SI, WR105SI.1, WR106SI, WR106SI.1, WR110MI, WR110MI.1, WR115MI
Log in with your credential on our Account web panel.
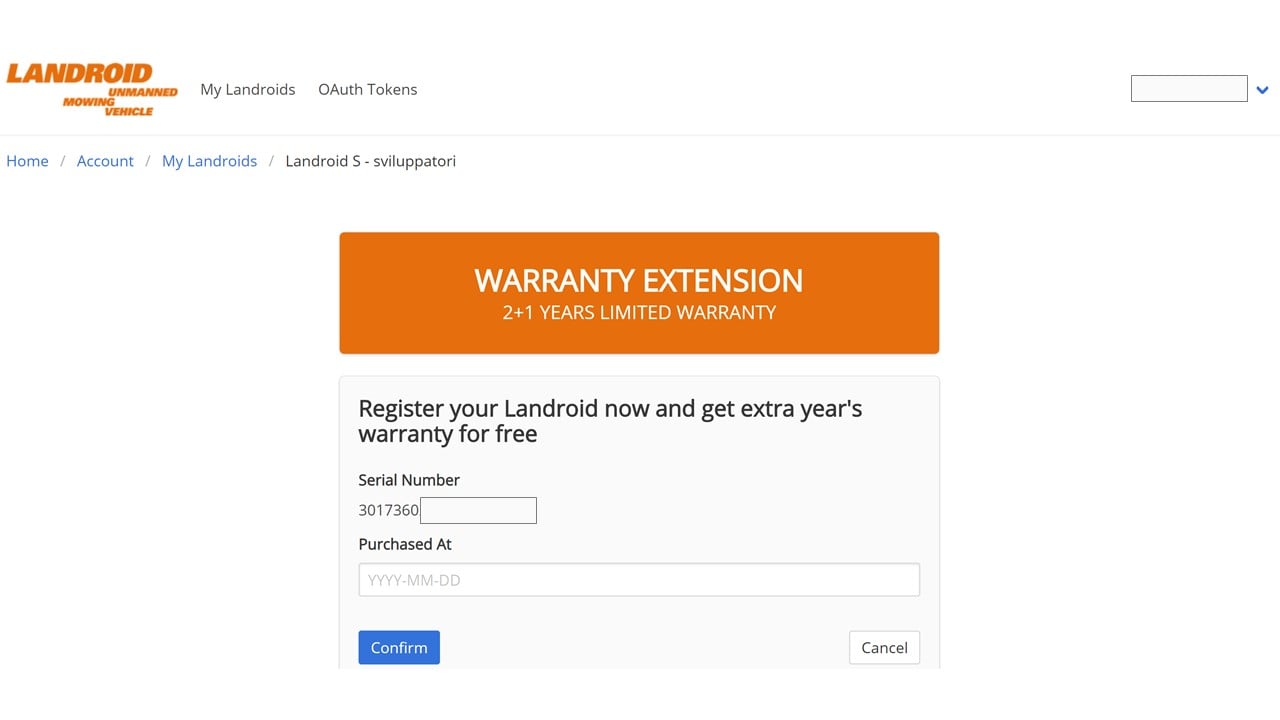
If you haven't registered your mower for the warranty extension, the system will ask you to do it first.

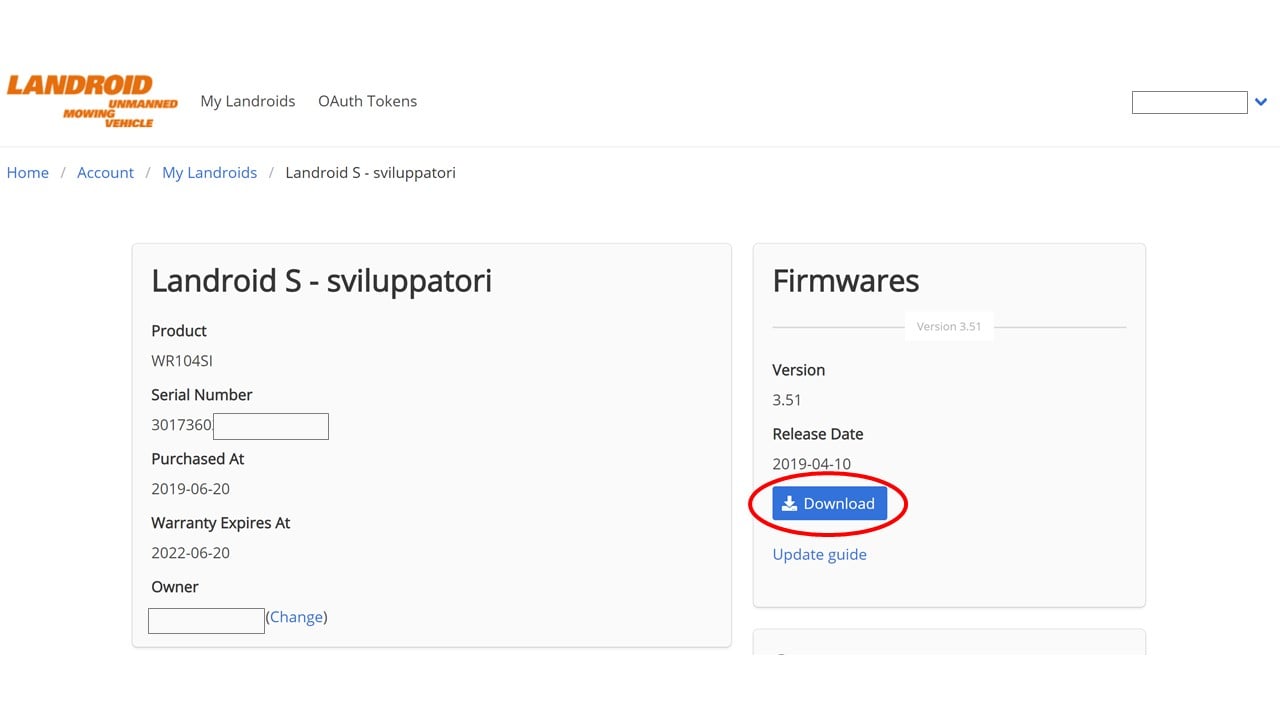
Once registered, select your mower model from the list the follow these steps:
1) Download the latest available firmware on your computer by clicking the download button.

2) Get a USB stick, insert in your computer and format it FAT32. Small capacity USB sticks (e.g. 2, 4 or 8GB) work better for this purpose.
3) Copy the file as it is (no need to unzip it) from your computer to the USB stick.
4) Locate the USB port of the robot, which is close to the carry handle, opposite to the on/off switch, covered by a rubber cover with the USB symbol on it.
5) Switch the robot off.
6) Insert the USB stick in the port, then power the robot on.
7) The battery indication light will start to pulse. When the triangle flashes blue, the file has been uploaded. You can now safely remove the USB stick.
8) Now the firmware update process starts. After several flashes and beeps, when only the battery green light remains lit, the update is completed.
Enjoy your newly updated Landroid.
